In Summary
-
Rump cap cooks best over steady glowing embers rather than aggressive flames.
-
Managing airflow and ember placement properly helps render the fat cap without burning it.
-
Reverse searing on a parrilla gives better crust development and more even cooking through the centre.
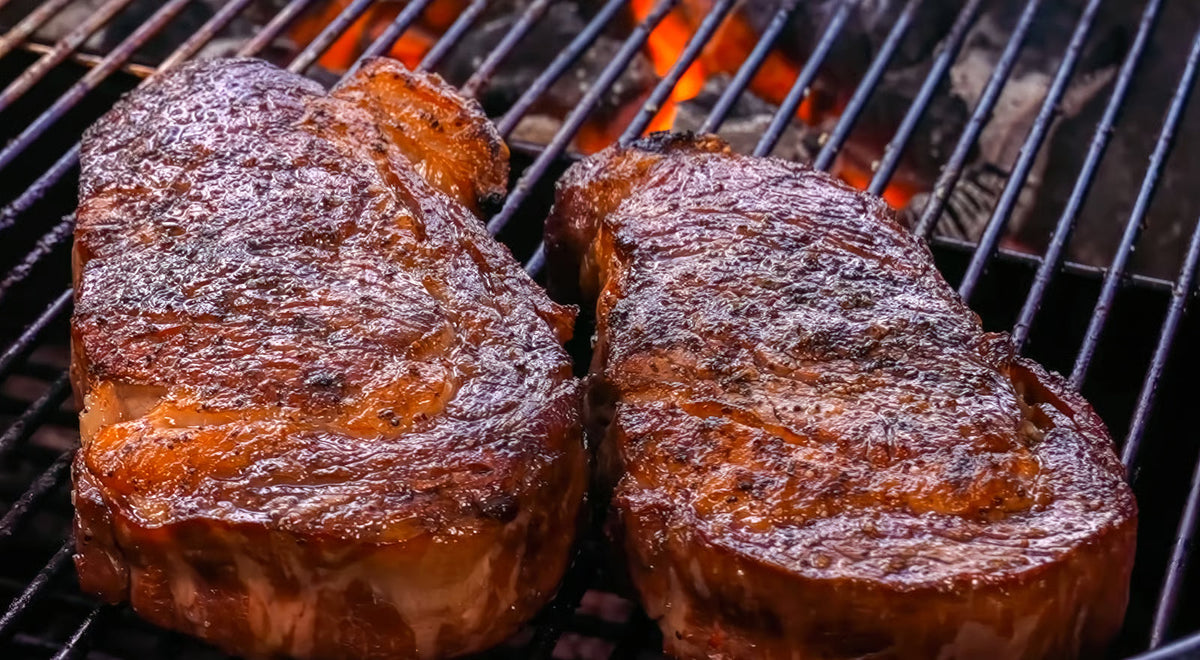
Rump cap is one of the best beef cuts you can cook over live fire. The fat cap protects the meat while the charcoal embers slowly build crust, smoke flavour and rendered fat across the outside. If you enjoy picanha, this is essentially the larger whole rump cap before it is sliced into steaks.
Cooking rump cap on a parrilla is less about blasting it with heat and more about patience, ember control and reading the fire properly. Good ember cooking gives you a deep beefy flavour, rendered fat and that clean charcoal aroma you only get from glowing hardwood embers.
This guide covers how to set up a parrilla, manage embers, cook rump cap evenly and avoid the common mistakes that leave the fat burnt and the inside undercooked.
What Is Rump Cap?
Rump cap sits on top of the rump primal and is covered by a thick fat layer. In Brazil, it is commonly called picanha once sliced into steaks, but cooking the whole rump cap over embers gives you slightly different results.
The whole cut usually weighs:
-
1kg to 2kg
-
Triangular shape
-
Thick external fat cap
-
Rich beef flavour
-
Excellent over charcoal
The fat cap is what makes this cut work so well over live fire. As the fat slowly renders, dripping fat hits the embers and creates light smoke that rolls back around the meat.
Why Rump Cap Works So Well On A Parrilla
Parrilla cooking suits fatty beef cuts because the radiant heat from embers cooks more evenly than direct flames.
Good ember cooking helps:
-
Render the fat gradually
-
Build proper crust
-
Avoid burnt flare-ups
-
Keep the centre juicy
-
Develop cleaner smoke flavour
A common beginner mistake is cooking rump cap directly over aggressive flames too early. That usually scorches the fat cap before the inside has time to warm through properly.
Steady ember heat works far better.
Our beginner guide to parrilla and asado cooking explains ember management, braseros and live fire airflow in more detail.
|
💡 Erik's Tip The biggest mistake with rump cap on a parrilla is rushing it. The fat cap needs time to slowly render from the heat. Start higher above the embers and let the cut warm through before you think about getting crust. |
Best Charcoal For Cooking Rump Cap
Dense hardwood lump charcoal is usually the best choice for parrilla cooking.
Good lump charcoal gives:
-
Cleaner smoke
-
Better airflow
-
Strong radiant heat
-
Faster ember response
-
Less ash build-up
Ironbark charcoal works especially well for beef because it burns hot and creates long-lasting embers.
Avoid cheap soft charcoal that:
-
Sparks heavily
-
Produces dirty smoke
-
Burns unevenly
-
Chokes airflow with excess ash
The quality of your embers changes the flavour of the meat more than most beginners realise.
|
⚠️ Important Note Cheap charcoal that produces dirty white smoke will coat the fat cap quickly. That bitter smoke flavour is very hard to wash out once it gets into the rendered fat. Start with clean-burning hardwood lump charcoal every time. |
Equipment Needed
You do not need a massive custom-built parrilla setup to cook rump cap properly.
A basic setup includes:
-
Sharp slicing knife
A brasero setup helps during longer cooks because you can continuously feed fresh embers underneath the grill as needed.

How To Set Up The Parrilla
1. Build A Proper Ember Bed
Start your charcoal early and let it settle into glowing embers before cooking.
You want:
-
Bright orange embers
-
Minimal flames
-
Thin clean smoke
-
Even charcoal spacing
Fresh black charcoal still catching fire creates unstable heat and dirty smoke. Good parrilla cooking usually starts after the fire calms down.
Our guide on how to light charcoal properly explains the best way to get a clean ember bed going before you start cooking.
2. Create Heat Zones
Set up:
-
Hotter ember zone
-
Medium cooking zone
-
Cooler resting zone
This gives you flexibility as flare-ups and airflow change during the cook. Live fire cooking constantly moves. Your heat zones should too.
3. Adjust Grill Height
If your parrilla is adjustable:
-
Start higher above the embers
-
Lower gradually later in the cook
-
Raise quickly during flare-ups
Cooking too low too early is one of the fastest ways to burn the fat cap.
|
💡 Erik's Tip Most adjustable parrilla grills have a wheel or lever that changes cooking height. Use it constantly during the cook — this is your main heat control tool on a parrilla, not a vent. |
Preparing The Rump Cap
Keep the fat cap on.
Trim only:
-
Loose silver skin
-
Excess hanging fat
-
Hard uneven sections
Leave roughly 1cm fat cap thickness.
Score the fat lightly if desired, but do not cut deeply into the meat.
Simple seasoning works best:
-
Coarse salt
-
Cracked black pepper
-
Optional garlic powder
Heavy sugary rubs burn quickly over embers.
|
⚠️ Important Note Do not use heavy sugary rubs or marinades on rump cap over a parrilla. Sugar burns fast over radiant ember heat and creates a bitter crust before the fat has had time to render properly. Keep seasoning simple. |
How To Cook Rump Cap Over Charcoal Embers

Step 1 — Start Fat Side Up
Place the rump cap over medium ember heat with the fat side facing upward first.
This helps:
-
Warm the meat gradually
-
Prevent early flare-ups
-
Start rendering internally
Cook with steady airflow and avoid chasing aggressive heat. Wind changes charcoal behaviour quickly, especially during longer cooks.
Step 2 — Rotate As Needed
Live fire cooking is rarely perfectly even. Rotate the rump cap occasionally if:
-
One side cooks faster
-
Wind shifts the heat
-
Ember intensity changes
Good parrilla cooking is about adapting to the fire rather than forcing perfect conditions.
Step 3 — Render The Fat Cap Slowly
Once the internal temperature reaches roughly 40–45°C, move the rump cap slightly closer to the embers and cook fat-side down.
You want:
-
Bubbling rendered fat
-
Golden crust development
-
Light sizzling
-
Controlled flare-ups
Small flare-ups are normal. Large flames licking the meat constantly usually mean:
-
Too much fat dripping
-
Grill too low
-
Embers too aggressive
Move the meat or spread the embers if needed.

Step 4 — Reverse Sear The Outside
Toward the end of the cook, lower the grill closer to the embers briefly for final crust development.
This stage builds:
-
Charcoal crust
-
Rendered edges
-
Deep caramelisation
-
Beefy bark
Do not leave it unattended here. Fat cap flare-ups happen quickly once fully rendered.
|
💡 Erik's Tip During the reverse sear stage, keep your BBQ gloves and tongs ready at all times. This is the stage where flare-ups happen fastest. A meat thermometer will tell you when to pull it off at exactly the right internal temperature. |
Internal Temperatures For Rump Cap
|
Doneness |
Internal Temp |
|
Rare |
49–52°C |
|
Medium Rare |
54–56°C |
|
Medium |
58–60°C |
For rump cap, medium rare usually gives the best balance between:
-
Rendered fat
-
Tender texture
-
Beef flavour
-
Juiciness
Always rest the meat after cooking.
Resting The Meat Properly
Rest the rump cap for 15–20 minutes minimum.
During the rest:
-
Fat settles properly
-
Juices redistribute
-
Carryover cooking finishes
-
Crust stabilises
Cutting too early releases a lot of moisture onto the board instead of staying inside the meat.
Slicing Rump Cap Correctly
Always slice across the grain.
For whole rump cap:
1. Identify the grain direction first
2. Rotate if needed
3. Slice thinly across the fibres
Poor slicing can make even perfectly cooked rump cap feel chewy.

Common Parrilla Mistakes
Cooking Over Flames Instead Of Embers
Good embers cook better than flames. Flames create:
-
Bitter smoke
-
Burnt fat
-
Uneven cooking
-
Harsh crust
Too Much Charcoal Early
Beginners often overload charcoal trying to create "restaurant heat". A smaller controlled ember bed cooks better.
Dirty Smoke
Restricted airflow creates thick white smoke that sticks to the fat quickly. You want:
-
Thin smoke
-
Clean combustion
-
Open airflow
Not Adjusting Grill Height
Parrilla cooking constantly changes. The grill height should change too.
Rushing The Fat Rendering
Fat cap beef cuts need patience. If the fat has not softened and rendered properly, the outside may look cooked while the texture still feels chewy.
|
⚠️ Important Note Every single one of these mistakes comes back to the same thing — impatience with the fire. Rump cap on a parrilla is not a fast cook. Give the ember bed time to settle, give the fat time to render, and give yourself time to adapt to the fire. |
What To Serve With Rump Cap
Rump cap works brilliantly with:
-
Chimichurri
-
Charred onions
-
Fire-roasted capsicum
-
Grilled potatoes
-
Simple salads
-
Crusty bread
Heavy sugary sauces often overpower the charcoal flavour.
Why Weather Changes Ember Cooking
Weather affects parrilla cooking more than people expect.
Wind can:
-
Increase ember intensity
-
Burn charcoal faster
-
Push heat unevenly
-
Trigger flare-ups
Cold weather slows rendering slightly while humidity changes smoke behaviour.
Experienced live fire cooks constantly adjust:
-
Ember placement
-
Grill height
-
Airflow
-
Fuel timing
That is normal with real fire cooking.
Related Guides & Products
If you want to learn more about parrilla cooking and live fire technique, these are a good place to start:
Frequently Asked Questions
|
Is rump cap the same as picanha? Picanha usually refers to rump cap sliced into steaks. Whole rump cap is simply the larger intact cut before slicing. |
|
Should I cook rump cap directly over flames? No. Rump cap cooks better over glowing embers. Flames are harder to control and often burn the fat cap too aggressively. |
|
What charcoal is best for parrilla cooking? Dense hardwood lump charcoal usually works best because it burns cleaner and creates stable radiant heat. Ironbark charcoal is a particularly good choice for beef. |
|
Why is my fat cap burning? Usually because the grill is too close to aggressive embers or flare-ups are not being controlled properly. Raise the grill height and spread the embers out. |
|
Can I reverse sear rump cap on a parrilla? Yes. Reverse searing works extremely well with rump cap because it renders the fat more evenly before building the final crust. |
|
How long does rump cap take over charcoal? Usually around 35–60 minutes depending on thickness, ember intensity, weather and grill height. |
Glossary
|
Brasero |
A separate firebox used to create embers for parrilla cooking. |
|
Radiant Heat |
Heat produced from glowing embers rather than direct flames. |
|
Fat Rendering |
The process where solid beef fat slowly melts during cooking. |
|
Reverse Sear |
Cooking gently first before finishing closer to high heat for crust development. |
|
Clean Smoke |
Thin blue or nearly invisible smoke produced by properly burning fuel. |